|
A. Log In |
1 |
1-4 |
| B. Add New Business (Ownership Information) |
1 |
5-14 |
| C. Add New Primary Testing Site (Tests Performed, Laboratory Director) |
1 |
15-29 |
| D. Select sites to include in the application |
2 |
30-32 |
|
a. Add Site (Secondary Testing Site #1, #2, #3, etc.) |
2 |
30-32 |
| E. Select Multisite License Qualification |
2 |
33-37 |
| F. Review Business Information |
2 |
38 |
|
G. Review Primary Testing Site Information |
2 |
39 |
| H. Review Secondary Sites Information |
3 |
40 |
| I. Upload Documents |
3 |
41-42 |
| J. Payment Information Summary |
3 |
43 |
| K. Sign Attestation |
3 |
44-46 |
| L. Pay and Submit Application |
3 |
47-53 |
The online application system is optimized for use on your desktop or laptop computer.
A. Log In
 Log in using your username/userID or email and password.
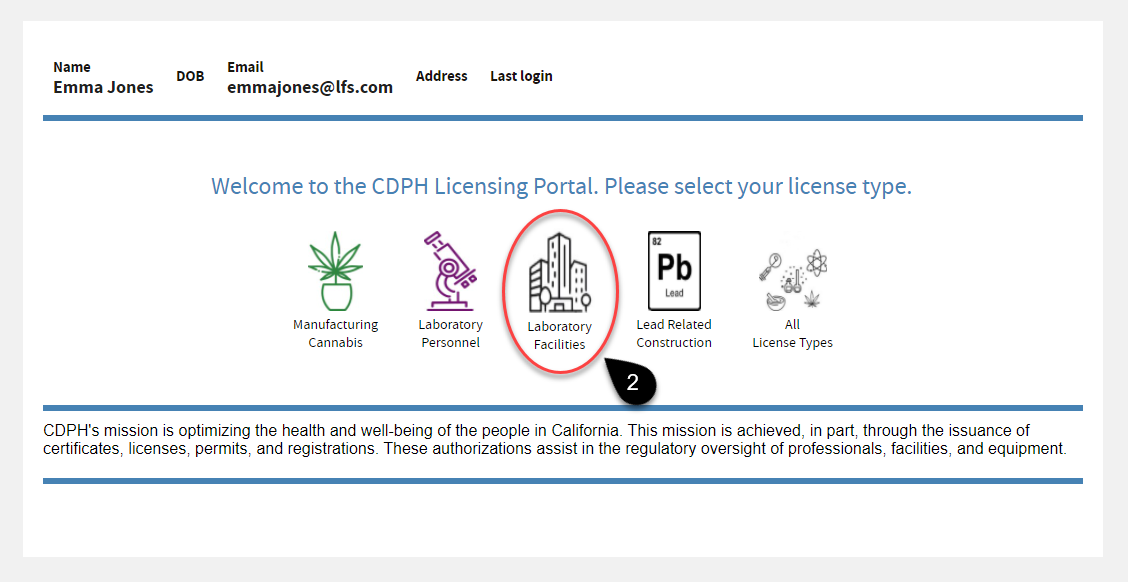
 On the CDPH Licensing Portal, click the
Laboratory Facilities icon.
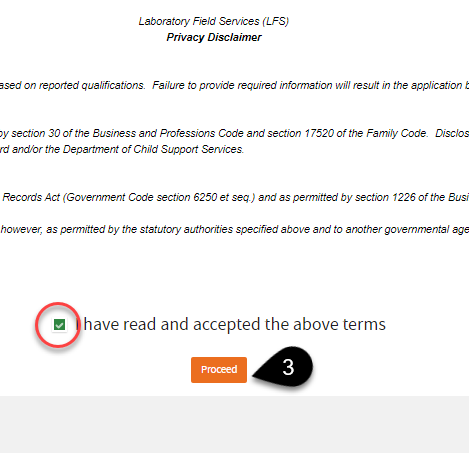
 Review the
Privacy Disclaimer. Click the checkbox to agree, then click
Proceed.
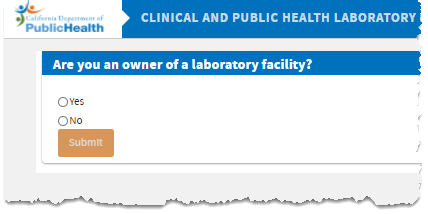
 Choose
Yes if you are the owner of the facility you are creating an account for. Choose
No if you are NOT the owner. Click
Submit.
Select
Yes, then
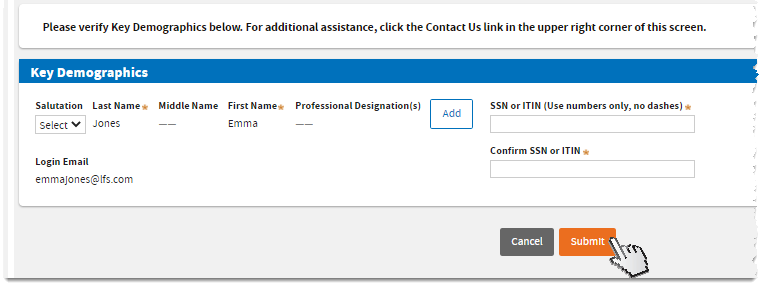
Submit. 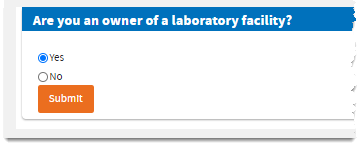
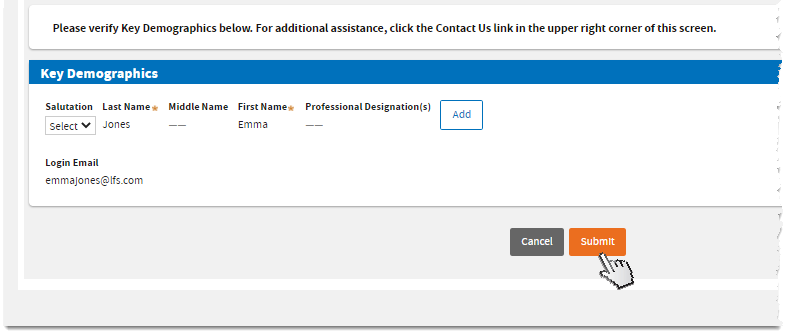
Verify your key demographics. Make sure all required fields marked with asterisks (*) are complete. Then, click
Submit.
Select
No, then
Submit. 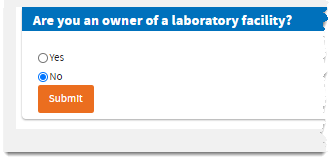
Verify your key demographics. Add your Professional Designation/s if desired. Then, click
Submit.
|
B. Add New Business (Ownership Information)
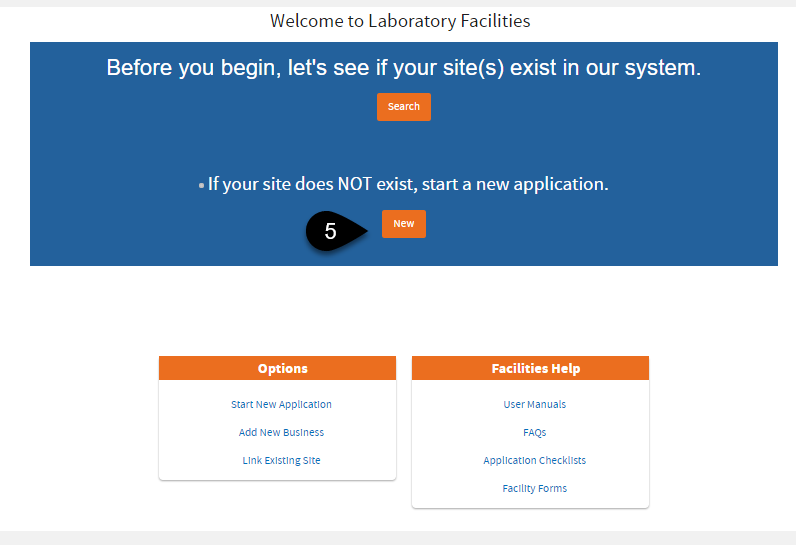
 Since your site is new and doesn’t exist in our database, click
New or
Start New Application.
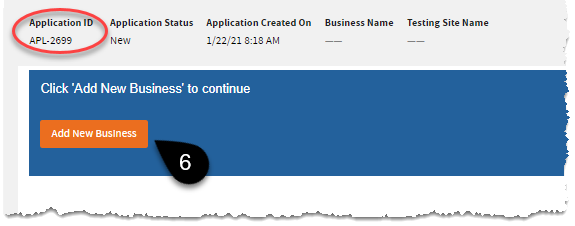
 Notice the system assigned application ID – you can use this as a reference when contacting us specifying the application.
 Add your
Business information. Click
Next.
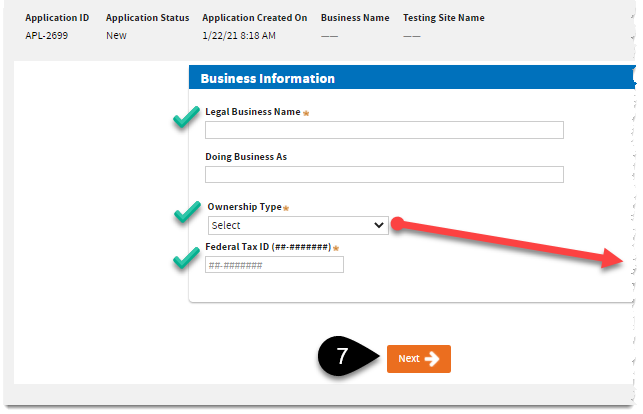 |
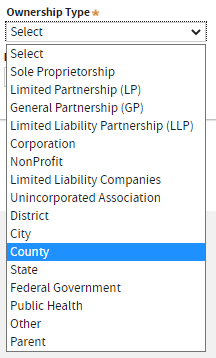
In this example, we’re selecting
County as the
Ownership Type.
|
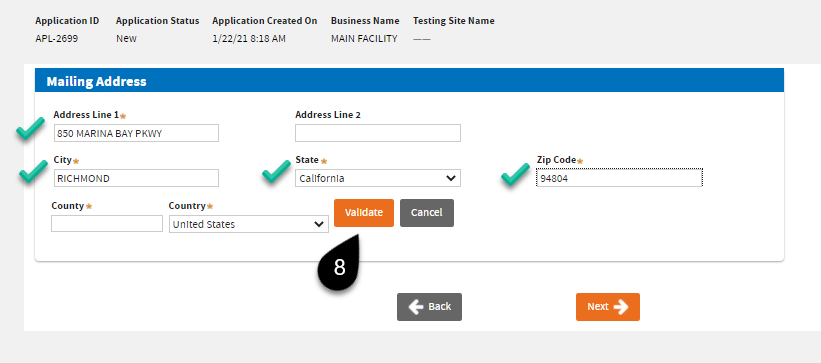
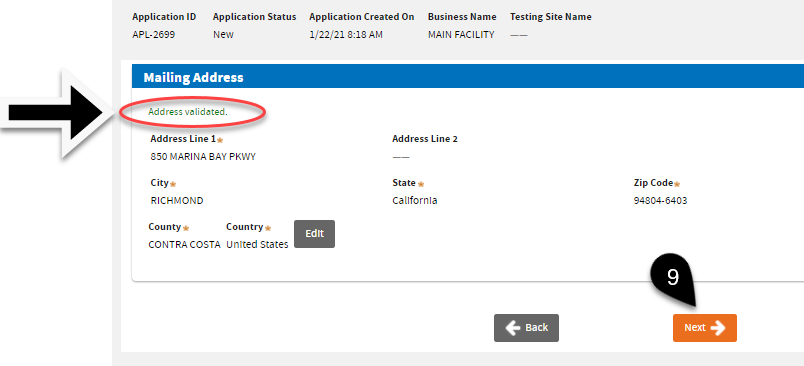
 The next screen will ask for your
Business Mailing Address. Click
Validate first. You should be able to see a “Address Validated” note before the system allows you to move forward.
 Then click
Next.
 |
 |
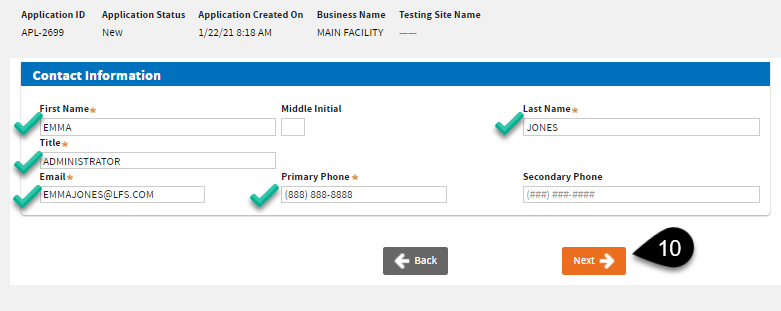
 The next screen will let you enter the
Business Contact Information. Click
Next once you have entered the required information.
 |
Note:Please make sure that your email address is correct. Our system will send notices and the certificate to this email address, and to the Testing Site email address.
|
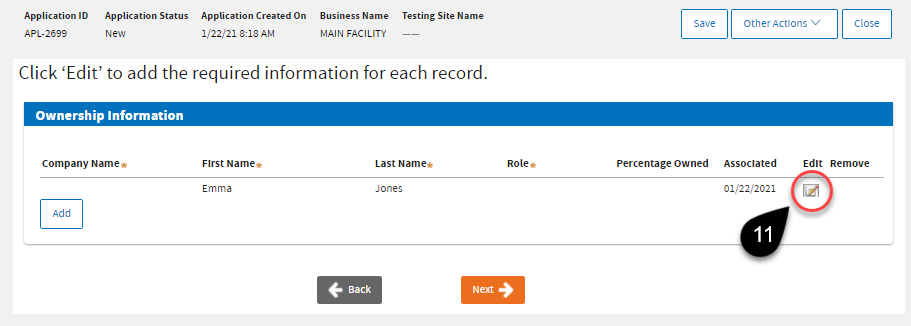
 Your name will appear under the
Ownership Information. Click the
Edit icon to specify your
Role.
|
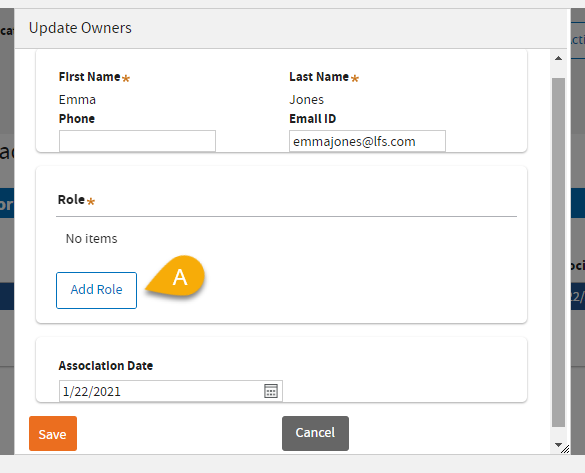
(11) A: Click
Add Role.
|
 |
|
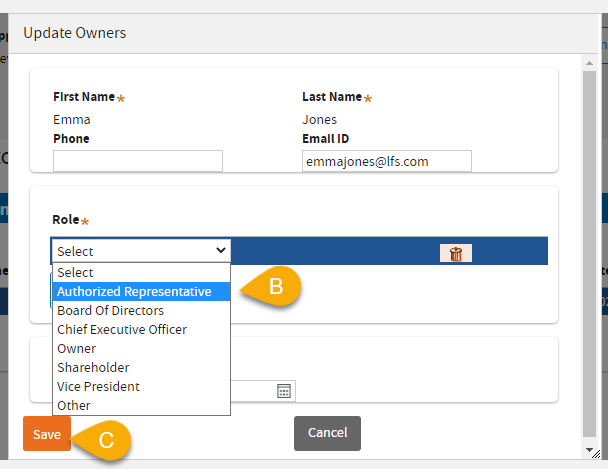
(11) B: In this example,
Authorized Representative was selected.
Note:
Authorized Representative Role will NOT be displayed on the certificate as Owner.
Owner Roles that will be displayed on the certificate:
-
Board of Directors
-
Chief Executive Officer
-
Owner
-
Shareholder
-
Vice President
-
Other
(11) C: Click
Save.
|
 |
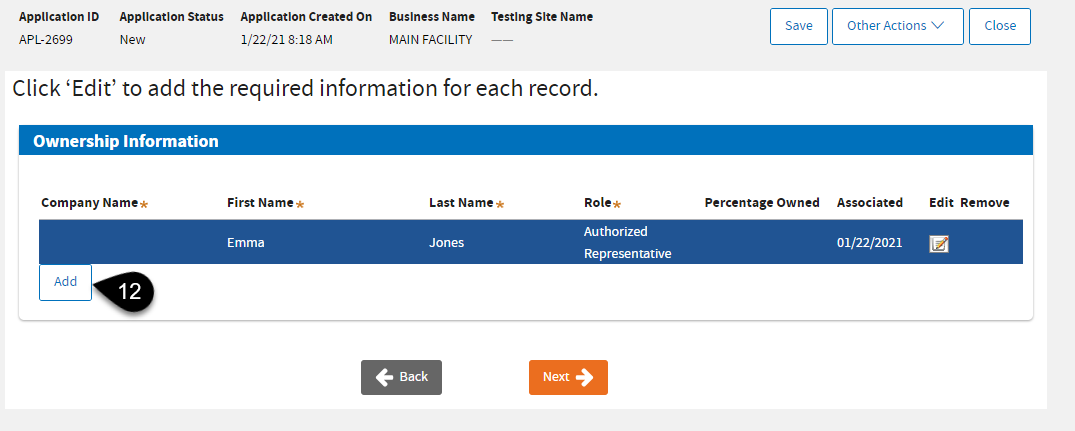
 On the same screen, click
Add if you need to add an owner. At least one owner role must be listed.
|
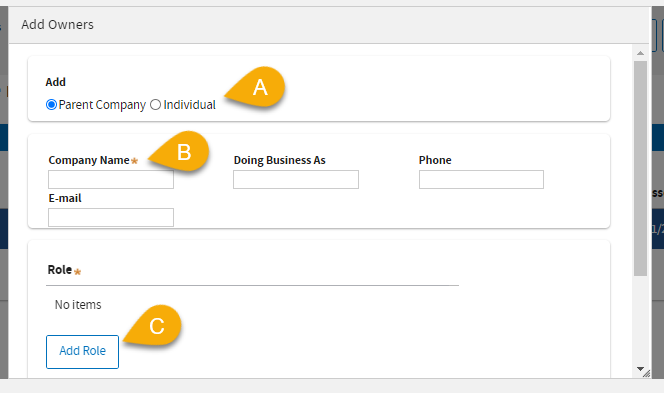
(12) A: Select
Parent Company or
Individual.
(12) B: Enter the required information.
(12) C: Click
Add Role to assign the appropriate role.
|
 |
|
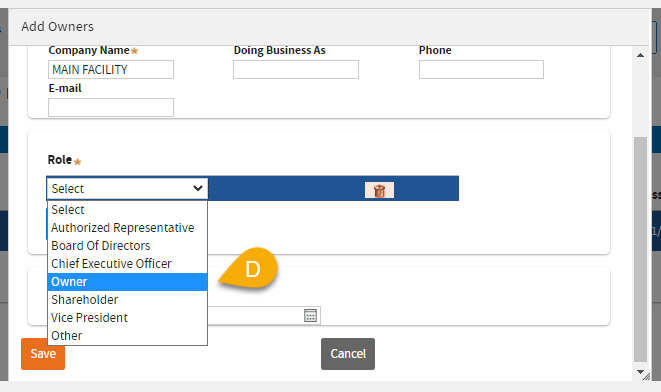
(12) D:Owner was selected as a Role for this example.
|
 |
|
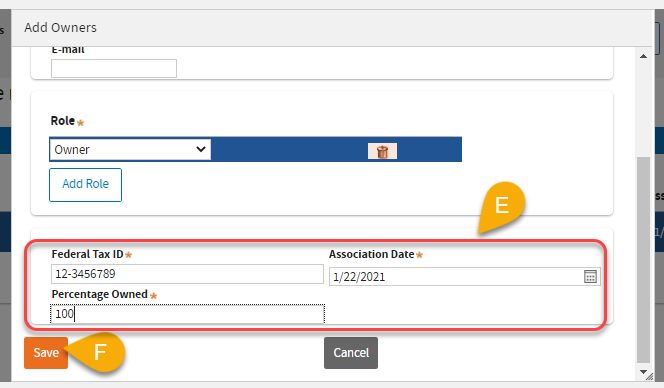
(12) E: Fill in the required fields.
(12) F: Click
Save.
|
 |
 Now that you’ve added the owner(s) and edited your role, you may click
Next.

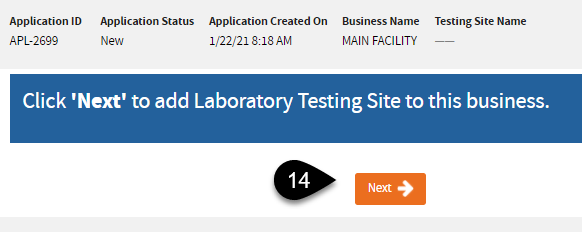
 Click the
Next button to proceed adding a Testing Site to the Business you have just entered.
C. Add Primary Testing Site (Tests Performed, Laboratory Director)
 Enter your
Primary or main Testing Site Information. Complete the required fields. On the
Physical Location, click the
Validate button.
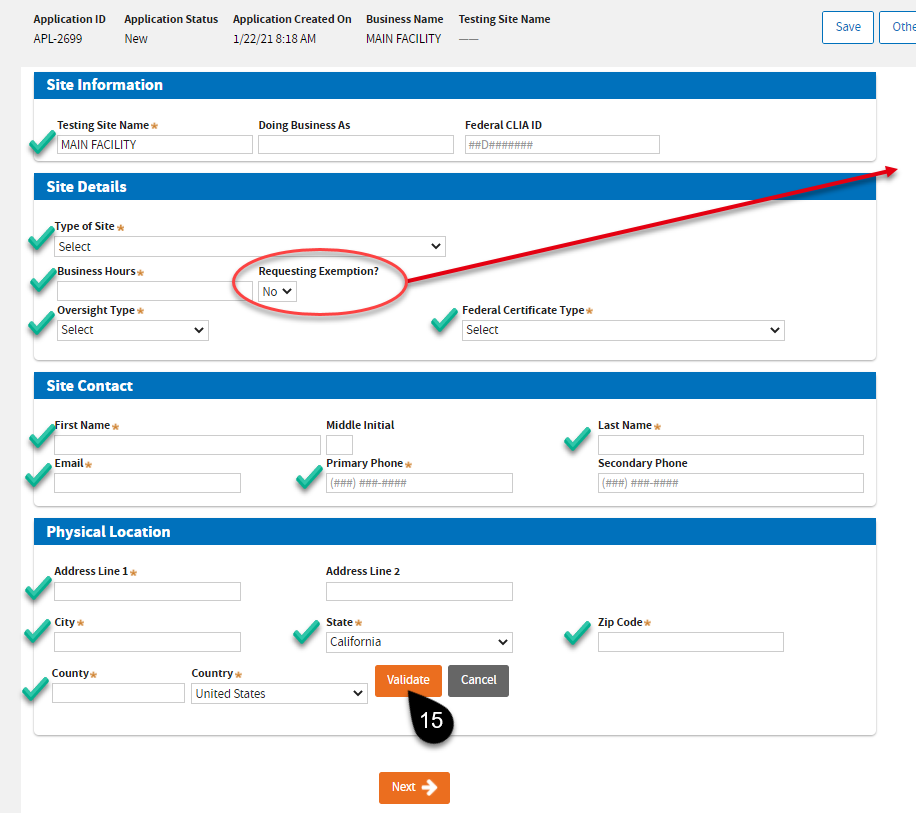 |
Note:This exemption is mainly for Public Health laboratories. To avoid delays, leave the selection at “No” if you do not qualify. Refer to
BPC 1241.
|
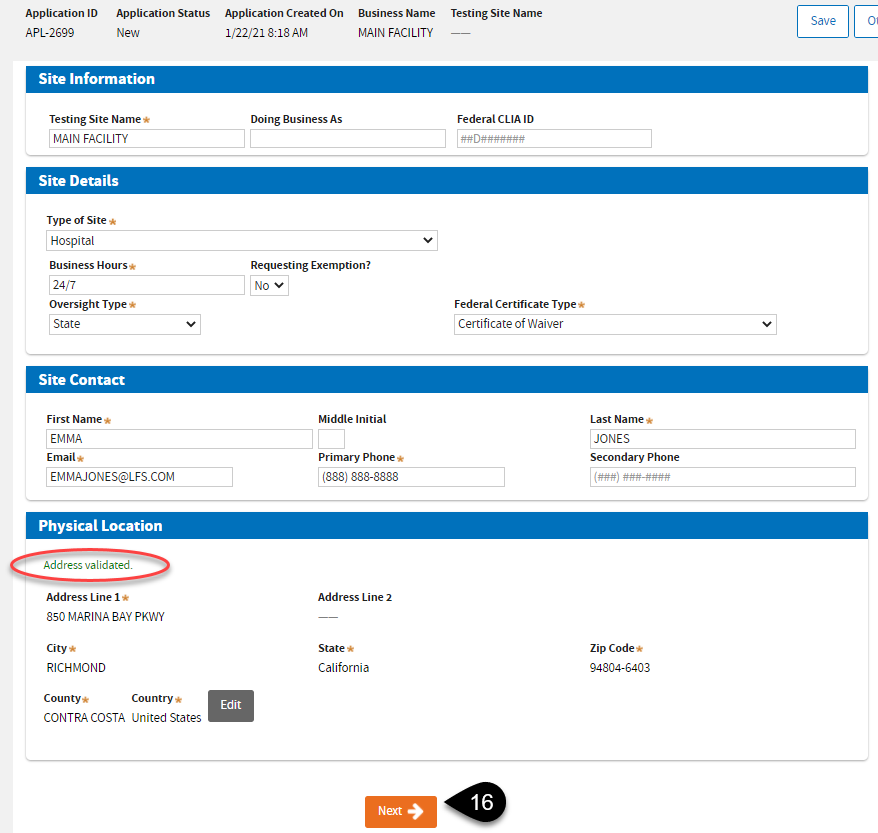
 You should see the “Address validated” notice before you can click the
Next button.
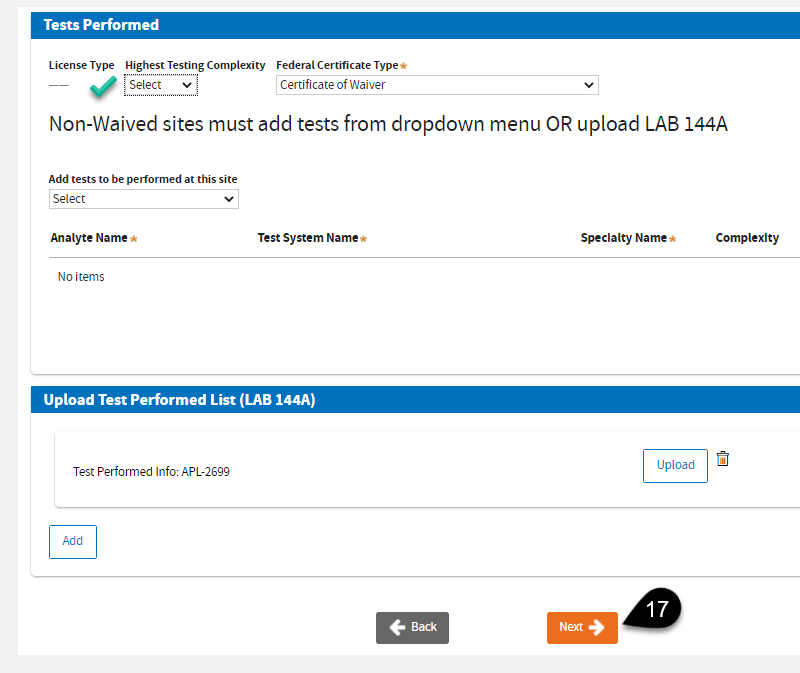
 On the
Test Performed page, Certificate of
Waiver or
PPMP can click
Next after selecting the appropriate
Highest Testing Complexity.
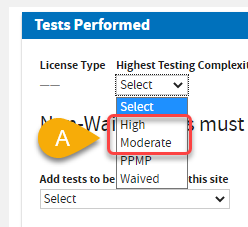
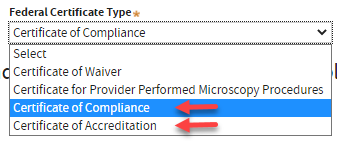
A. Select
Highest Testing Complexity:
High or
Moderate. Select the applicable
Federal Certificate Type if necessary.
 |
 |
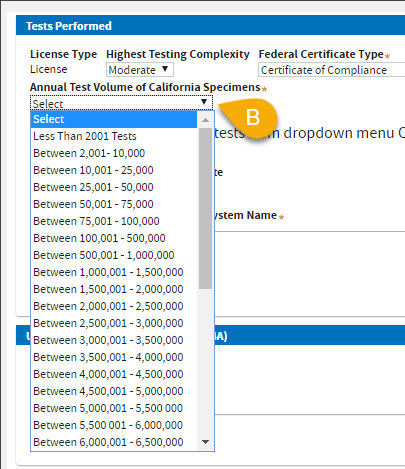
B. Select
Annual Test Volume of California Specimens.
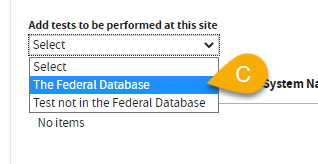
C. Select
The Federal Database to add tests -OR- upload a completed
LAB 144A (PDF).
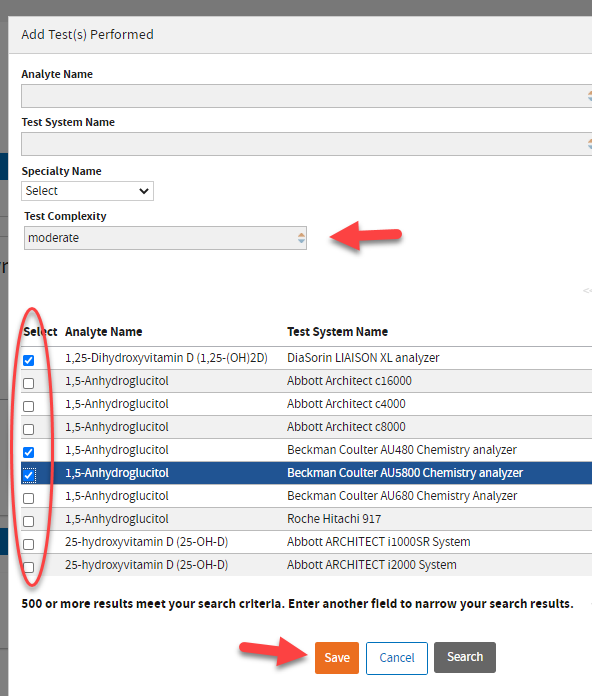
A window will pop-up. Use any field to enter your test information.
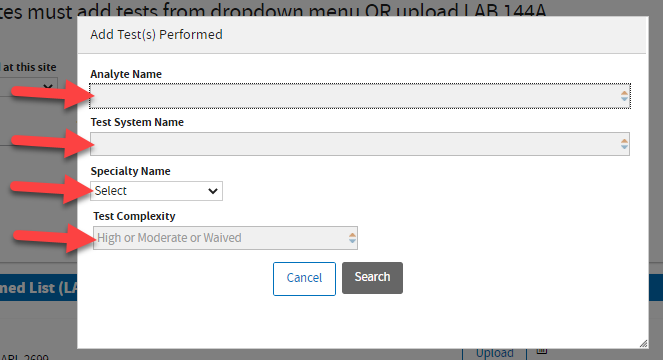
In this example, we are typing “moderate” in the
Test Complexity field to view and select the appropriate Analyte. Click
Save to add the selected items to your application.
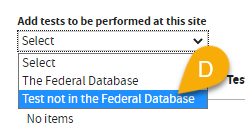
D. You can also select
Test not in the Federal Database option to add tests that are
not found in
The Federal Database.
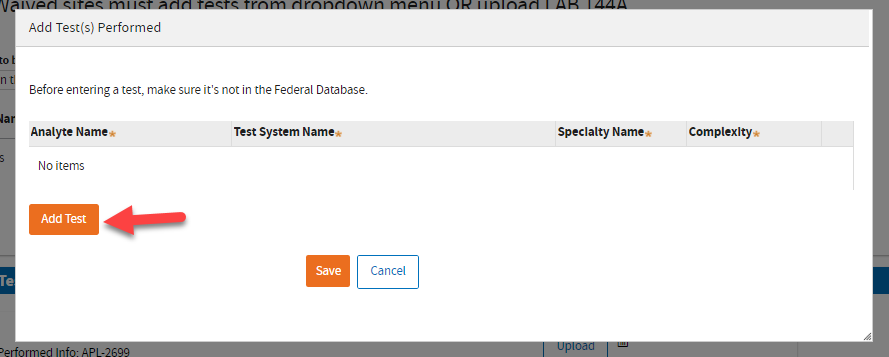
Click the
Add Test button.
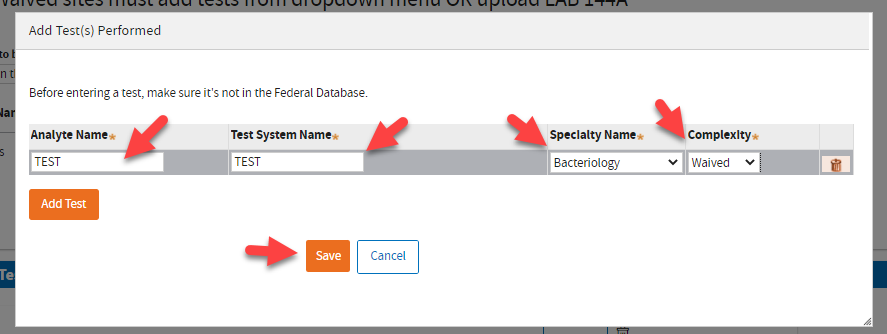
Type the information and click
Save when you’re done.
|
 The next page is where you can enter information on
Laboratory Personnel. Click
Add New Laboratory Director.
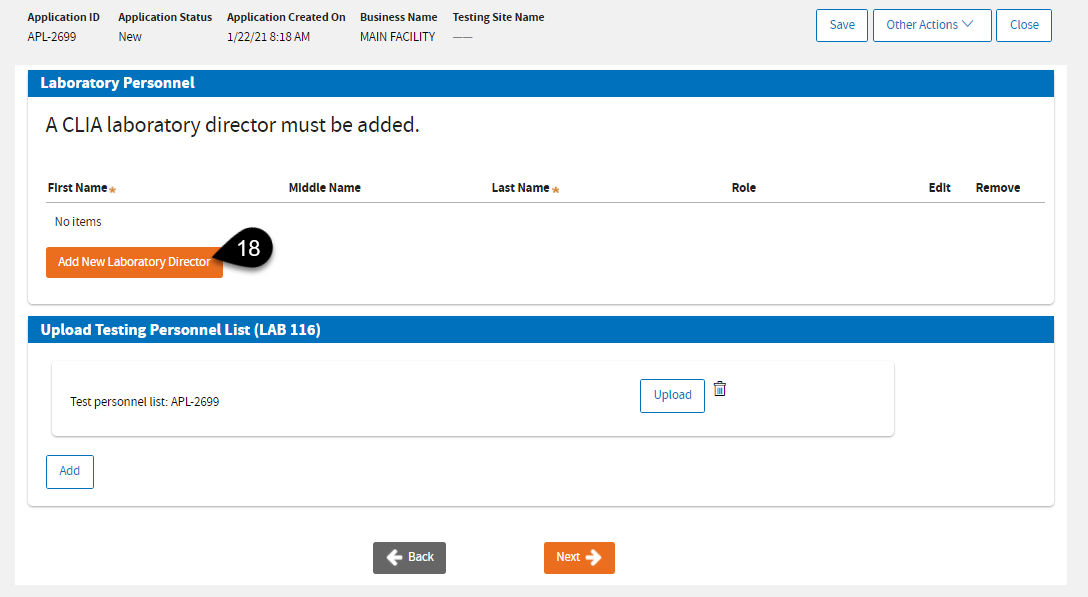 |
Note:You may click
Add From Existing Personnel button when it shows. This button will appear as you add your secondary sites. This will allow you to select previously added Laboratory Directors.
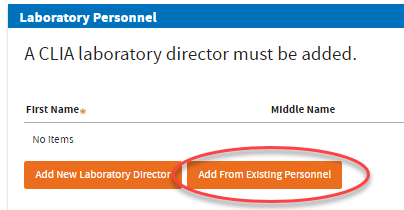
|
 Click
Add New Individual or search for the license if licensed by LFS.
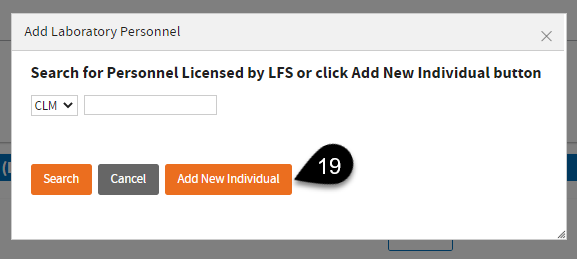
 Enter required information and click Add Role.
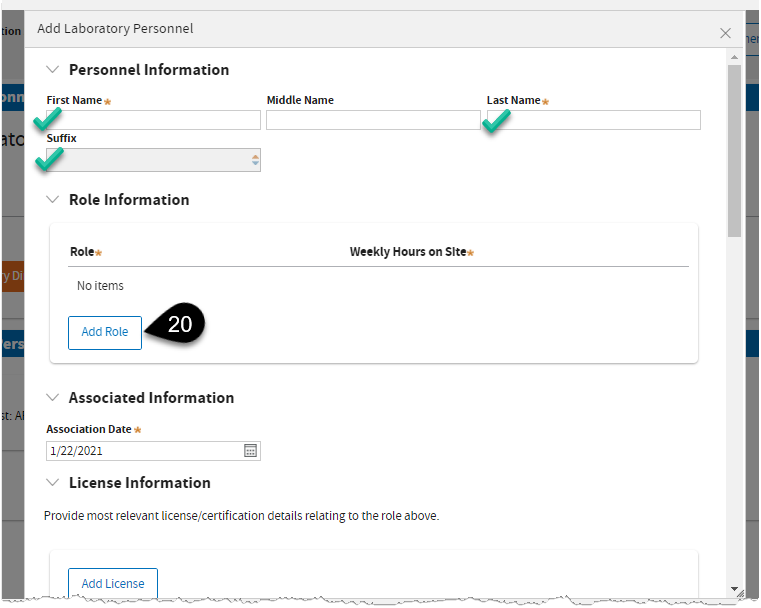
 Select
Laboratory Director.
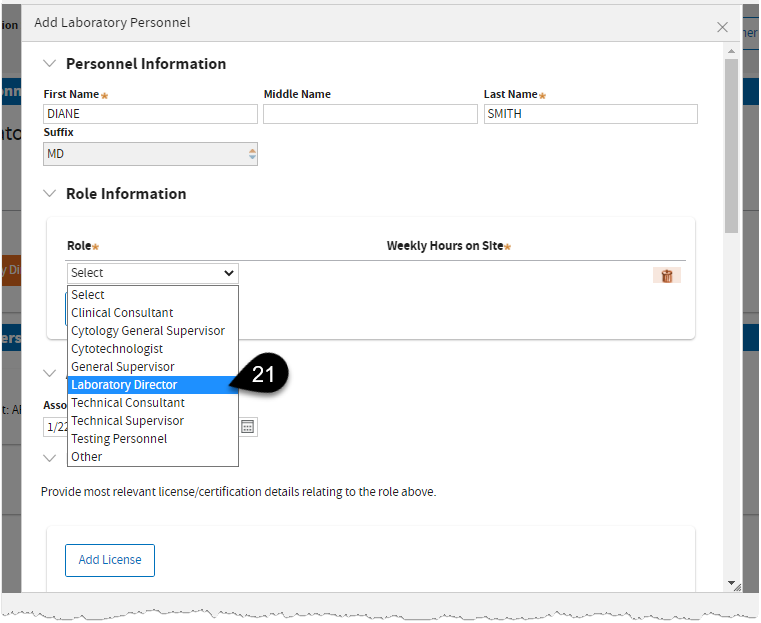
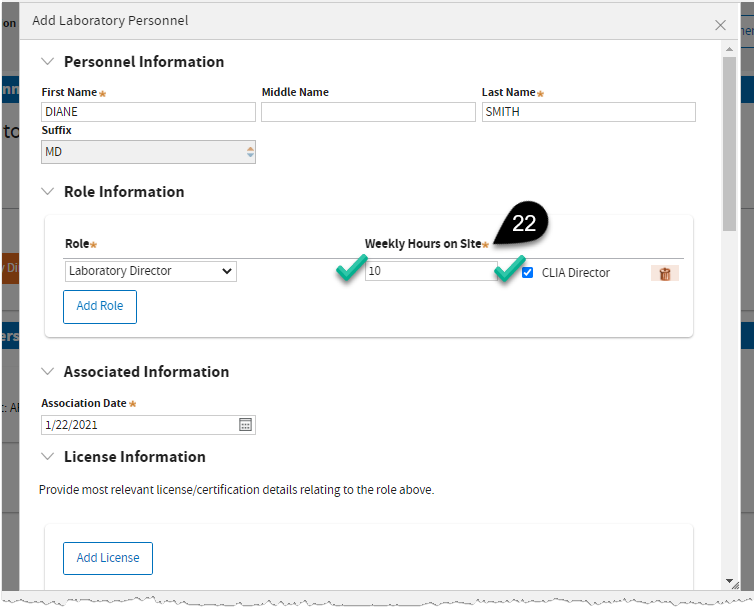
 Enter
Weekly Hours on Site, then
tick the CLIA Director.
Note:There must be one CLIA Director in a Testing Site.
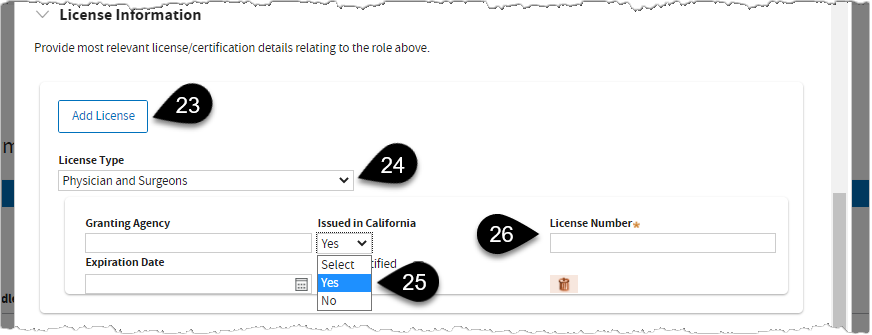
 Scroll down to
License Information. Click
Add License.
 In this example,
Physician and Surgeons is selected as the License Type.
 Select
Yes if license is issued in California. If
No is selected, the system will require you to enter Education, Training, and Experience details below the screen.
 Enter the required
License Number.
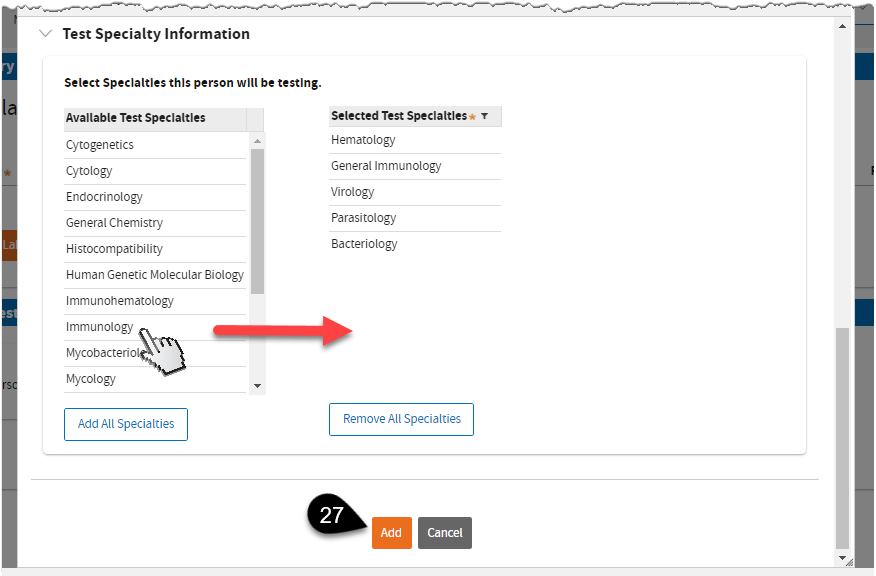
 Scroll down to
Test Specialty Information. Click on a test specialty to select, then click the
Add button.
 After adding a Laboratory Director, if your test complexity is
PPMP, or Moderate, or High – the system will require you to upload a completed
LAB 116.pdf form . Click
Next when you’re done.
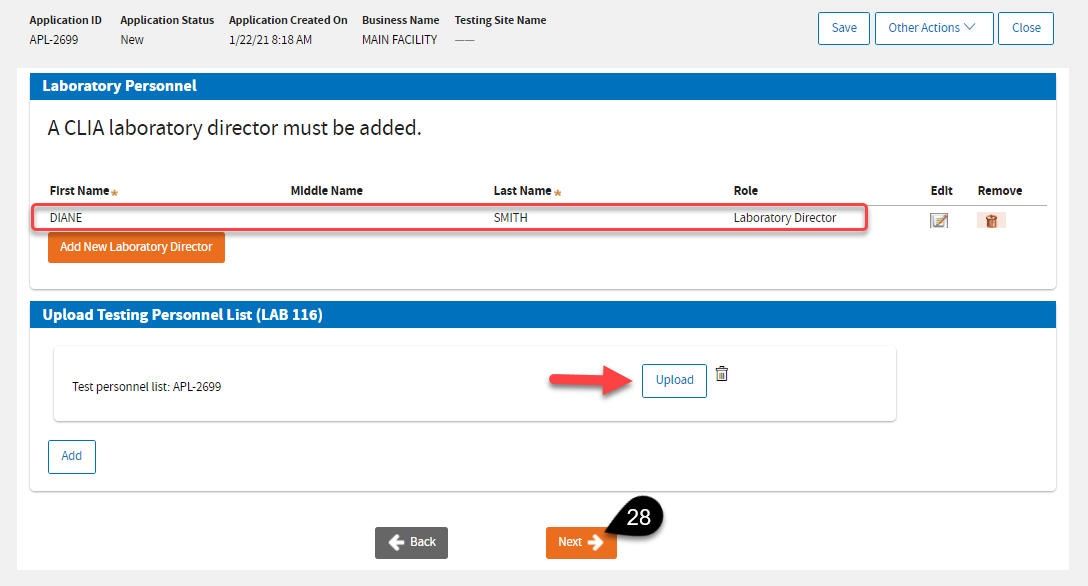
 Click
Next to continue.
